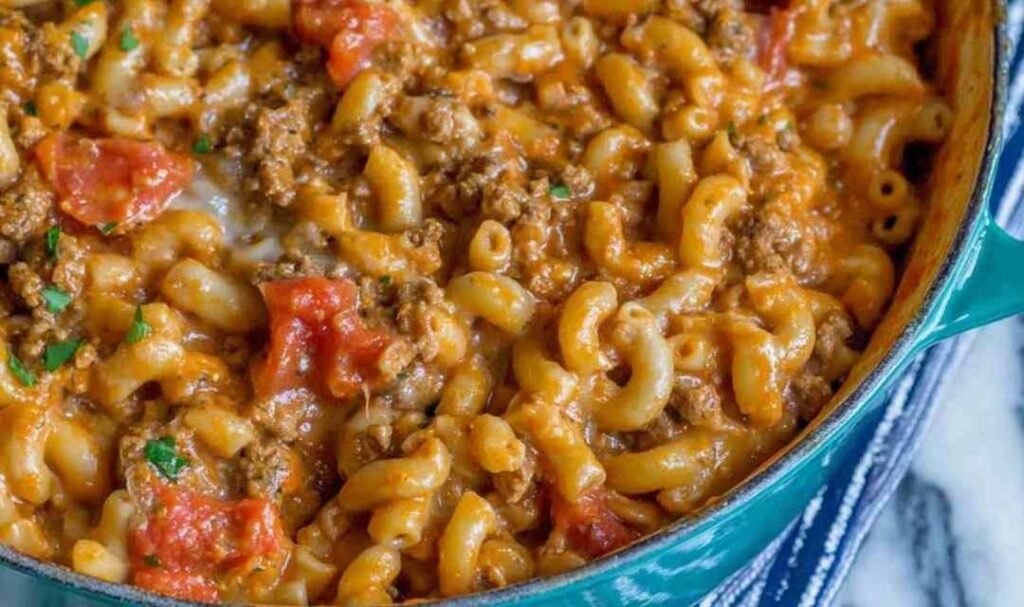
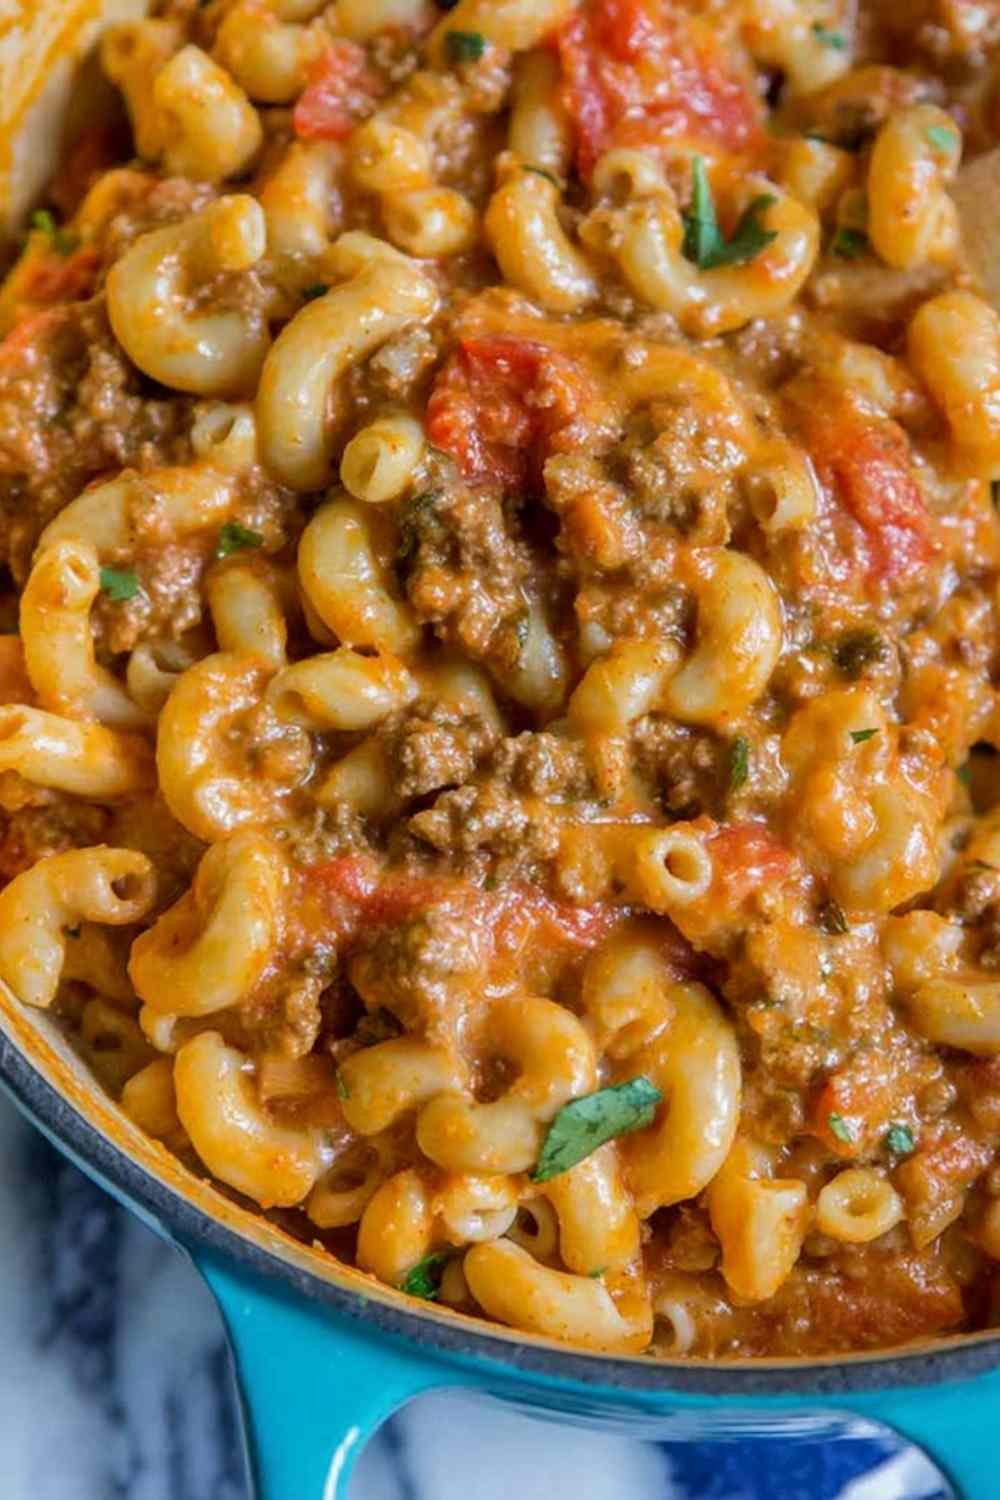
Chili mac and cheese is one of those dinners that just works every single time. It is a hearty one-pot meal packed with ground beef, tender macaroni, beans, and a rich cheesy broth that comes together in just 30 minutes. I first made this on a busy weeknight when the fridge was nearly empty, and it has been a family staple ever since.
This recipe is pure comfort food at its best. Everything cooks in one pot, which means less cleanup and more time with the family. The bold chili spices paired with creamy melted cheese make every bite satisfying. My kids ask for this one by name, and that alone tells you everything you need to know.
Table of Contents
If you love hearty ground beef dinners, you might also enjoy this High Protein Creamy Beef Pasta or this bold and saucy Ground Beef Chili that uses a similar spice profile.
Ingredients for Chili Mac and Cheese
I always keep most of these pantry staples on hand, which is exactly what makes chili mac and cheese such a reliable weeknight win. Here is everything you need to get started:
- 1 lb ground beef (80/20 blend works best for flavor and richness)
- 1 medium onion, chopped
- 2 tsp garlic, minced – I recommend fresh garlic cloves over pre-minced jarred garlic for the best aroma
- 2 tbsp all-purpose flour
- 1 tsp salt
- 1/2 tsp paprika
- 1/2 tsp smoked paprika – my preference is smoked over plain paprika for that subtle depth
- 1 tsp dried oregano
- 1-1/2 tsp cumin
- 2-1/2 tsp chili powder
- 4 cups beef broth – I usually use Better Than Bouillon beef base mixed with water for a richer flavor
- 1 (10-oz) can Rotel, undrained – the fire roasted variety is a real game changer here
- 1 (8-oz) can tomato sauce
- 1 (15-oz) can beans, drained (kidney or white beans)
- 2 cups dry elbow macaroni
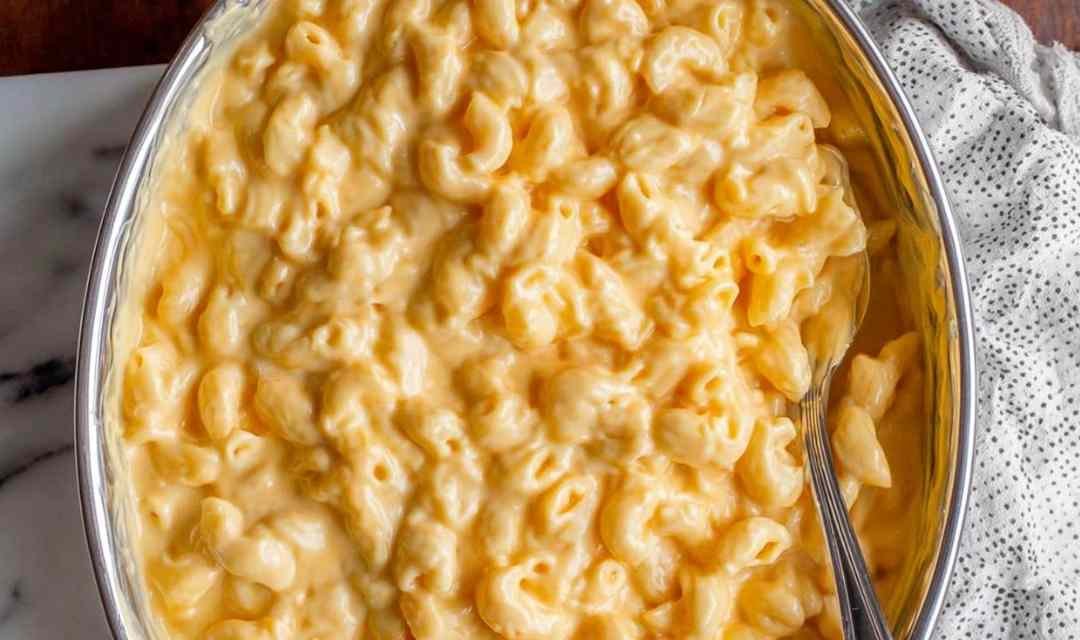
- 8 oz Velveeta, roughly chopped OR 8 oz freshly shredded sharp cheddar – in my experience, Velveeta gives the creamiest, most consistent result
- Salt and pepper to taste
To Garnish:
- Crushed tortilla chips
- Sour cream
- Shredded cheddar cheese
- Chopped white onions
- Sliced avocado
Step-by-Step Instructions
I recommend reading through all the steps once before you start cooking. The whole process moves quickly, and having everything prepped and ready makes a real difference.
Step 1: Heat a large pot over medium heat. Add the ground beef and break it up with a wooden spoon. Add the chopped onion and cook for 5 to 8 minutes, until the beef is fully browned with no pink remaining and the onion is soft and translucent.
Step 2: Add the minced garlic and stir constantly for about 1 minute until fragrant. Watch the heat closely here because garlic burns fast and turns bitter.
Step 3: Carefully drain the excess fat from the pot using a colander set over a bowl. Return the beef mixture to the pot and turn the heat back to medium.
Step 4: Add the flour, salt, paprika, smoked paprika, oregano, cumin, and chili powder. Stir everything together and cook for 1 full minute. This step toasts the spices and helps thicken the broth later, so do not skip it.
Step 5: Pour in the beef broth, Rotel with all its juices, tomato sauce, and drained beans. Stir to combine and turn the heat to high. Bring everything to a full rolling boil.
Step 6: Add the dry elbow macaroni. If using Velveeta, add the roughly chopped pieces now alongside the pasta. Stir occasionally and cook for about 8 minutes, until the pasta is al dente and the Velveeta is fully melted into a smooth, creamy sauce.
Step 7: If using shredded cheddar instead, wait until the pasta is al dente, then turn off the heat completely. Add the shredded cheddar and stir until melted. Do not add shredded cheese over active heat or it may turn grainy.
Step 8: Season with salt and pepper to taste. Serve hot with your favorite garnishes piled on top.
Best Side Dishes for Chili Mac and Cheese
The bold, smoky flavors in this dish pair beautifully with sides that add a little freshness, crunch, or comfort.
Honey Cornbread: The gentle sweetness balances the smoky chili spices perfectly. It is also great for scooping up every last bit of cheesy broth from the bowl.
Buttermilk Biscuits: Soft, flaky, and buttery, biscuits add a comforting contrast to the hearty one-pot base without competing with the bold flavors.
Simple Green Salad: A crisp salad tossed with a light vinaigrette cuts through the richness of the cheese and adds a refreshing, nutritious balance to the plate.
Broccoli Cheddar Soup: On colder nights, pairing a small cup of this Broccoli Cheddar Soup alongside your chili mac makes for a cozy, satisfying spread the whole family will love.
Cheesy Taco Potatoes: If you want to go all in on comfort food, these Cheesy Taco Potatoes share the same bold Tex-Mex flavor profile and make a fun and filling side.
Cilantro Lime Rice: Light and fragrant, this Cilantro Lime Rice adds a fresh, zesty contrast that balances the richness of the chili mac beautifully.
Beef and Broccoli: For a heartier spread when feeding a crowd, this Beef and Broccoli brings savory depth and a satisfying veggie element to the table.

Storage and Serving Tips
Leftover chili mac and cheese keeps well in an airtight container in the refrigerator for up to 4 days. The pasta will absorb more liquid as it sits, so expect a thicker texture the next day.
To reheat, add a splash of beef broth or water to loosen things up, then warm it on the stovetop over medium-low heat or in the microwave in 90-second intervals, stirring between each one. I recommend the stovetop method for the best texture and most even heating.
This dish also freezes well for up to 3 months. Just keep in mind the pasta will be softer after thawing. It is still completely delicious, just a little more tender. Store it in individual portions for easy grab-and-go weeknight meals.
Frequently Asked Questions
Can I make chili mac and cheese ahead of time?
Yes. You can make the full recipe and store it in the fridge for up to 4 days. When reheating, add a splash of broth to bring it back to the right consistency. The flavor actually deepens overnight, making leftovers just as good as the first night.
What is the best cheese to use in chili mac?
Velveeta melts into the smoothest, creamiest sauce and holds up well without breaking. Freshly shredded sharp cheddar is a great natural alternative. Avoid pre-shredded bagged cheese as the anti-caking coating can make the sauce grainy.
Can I make this recipe without meat?
Absolutely. Skip the ground beef and add an extra can of beans instead. Swap the beef broth for vegetable broth and follow the rest of the steps exactly. You still get a hearty, protein-packed bowl that is completely satisfying.
Conclusion
Chili mac and cheese is proof that a comforting, crowd-pleasing dinner does not need to be complicated. With simple pantry staples and just one pot, you get a bold, cheesy, filling meal that is ready in 30 minutes flat. Give it a try tonight and do not be surprised when the whole family goes back for seconds.
Chili Mac and Cheese
Ingredients
Equipment
Method
- Heat a large pot over medium heat. Add the ground beef and break it up with a wooden spoon. Add the chopped onion and cook for 5 to 8 minutes, until the beef is fully browned with no pink remaining and the onion is soft and translucent.
- Add the minced garlic and stir constantly for about 1 minute until fragrant. Watch the heat closely so the garlic does not burn.
- Carefully drain the excess fat from the pot using a colander set over a bowl. Return the beef mixture to the pot and turn the heat back to medium.
- Add the flour, salt, paprika, smoked paprika, oregano, cumin, and chili powder. Stir everything together and cook for 1 full minute to toast the spices and help thicken the broth.
- Pour in the beef broth, Rotel with all its juices, tomato sauce, and drained beans. Stir to combine and turn the heat to high. Bring everything to a full rolling boil.
- Add the dry elbow macaroni. If using Velveeta, add the roughly chopped pieces now. Stir occasionally and cook for about 8 minutes, until the pasta is al dente and the Velveeta is fully melted into a smooth, creamy sauce.
- If using shredded cheddar, turn off the heat once the pasta is al dente. Add the shredded cheese and stir until fully melted. Do not add shredded cheese over active heat or it may turn grainy.
- Season with salt and pepper to taste. Serve hot with your favorite garnishes piled on top.


")