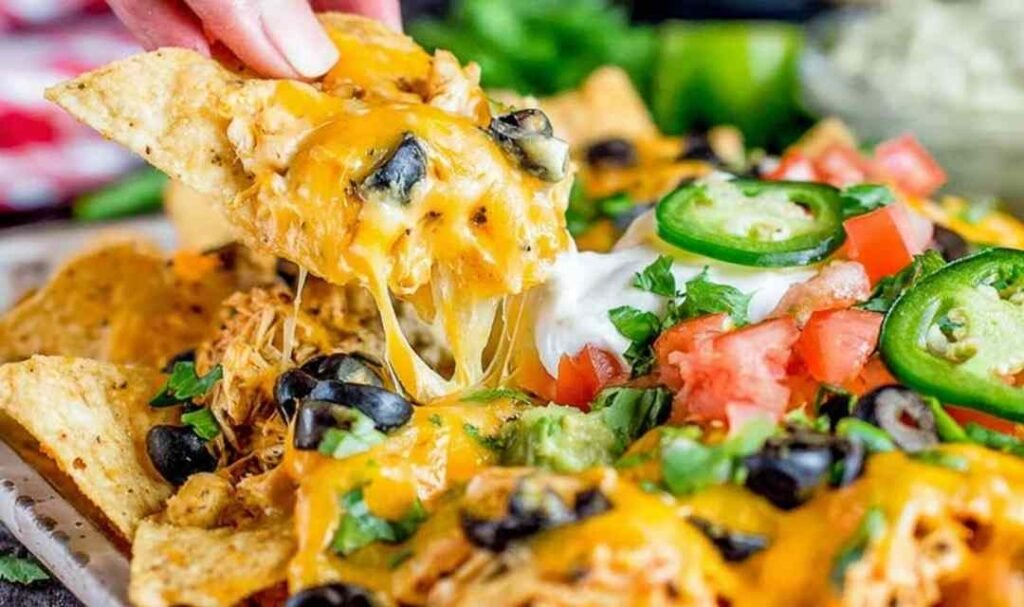
Easy Rotisserie Chicken Nachos are the kind of dinner that saves the night. You grab a rotisserie chicken on the way home, layer everything on a sheet pan, and 20 minutes later, dinner is done. My family goes absolutely wild for this one every single time.
I still remember the first time I threw these together on a Tuesday night with zero energy and a very hungry crew waiting at the table. One store-bought rotisserie chicken, a bag of chips, and a block of cheese later, we had a dinner everyone cleaned up without a single complaint. That is the magic of easy rotisserie chicken nachos. They feel like a treat, but they come together with almost no effort. Cheesy, crispy, loaded with flavor, and completely customizable for every picky eater at the table.
Table of Contents
Ingredients for Easy Rotisserie Chicken Nachos
I have made this recipe more times than I can count, and the ingredient list stays simple on purpose. Every item pulls its weight and nothing fancy is required. Here is what I always grab:
- 1 (12 oz) bag tortilla chips (restaurant-style holds up best in the oven and does not go soggy as fast)
- 2 cups shredded rotisserie chicken (I always pull it while still warm for easier shredding)
- 1 (15 oz) can black or pinto beans, drained and rinsed (my preference is black beans for a slightly earthy flavor)
- 8 oz shredded Mexican blend cheese, about 2 cups (I recommend shredding your own from a block for better melt and coverage)
- 1/2 cup pico de gallo salsa (store-bought works great, or just quickly chop fresh tomato, onion, and jalapeno)
Toppings to serve:
- Sour cream
- Guacamole or sliced avocado
- Chopped fresh cilantro
- Diced tomatoes
- Extra salsa
- Pickled jalapenos
Step-by-Step Instructions
In my experience, the two-layer method is what separates great nachos from mediocre ones. Every chip gets cheese and toppings, which means no sad, bare chips sitting at the edge of the pan. Follow these steps and you will get it right every time.
Step 1: Preheat your oven to 425 degrees F. Line a large rimmed baking sheet or a high-sided oven-safe skillet with aluminum foil or parchment paper. This single step saves you from a serious cleanup situation later.
Step 2: Spread half of the tortilla chips in an even layer across the lined pan. Top with half the shredded rotisserie chicken, half the drained and rinsed beans, and half the shredded cheese. Spread everything as evenly as you can so each chip gets covered.
Step 3: Add the second layer of chips directly on top of the first, then finish with the remaining chicken, beans, and cheese. Arrange the top chips slightly fanned out so they are easy to pull apart when serving. Pro tip: do not pack the chips too tightly or the bottom layer will steam instead of staying crispy.
Step 4: Slide the pan into the oven and bake for 10 to 12 minutes, or until the cheese is fully melted and bubbling. Keep a close eye on the edges around the 10-minute mark since the outer chips can brown quickly at this temperature.
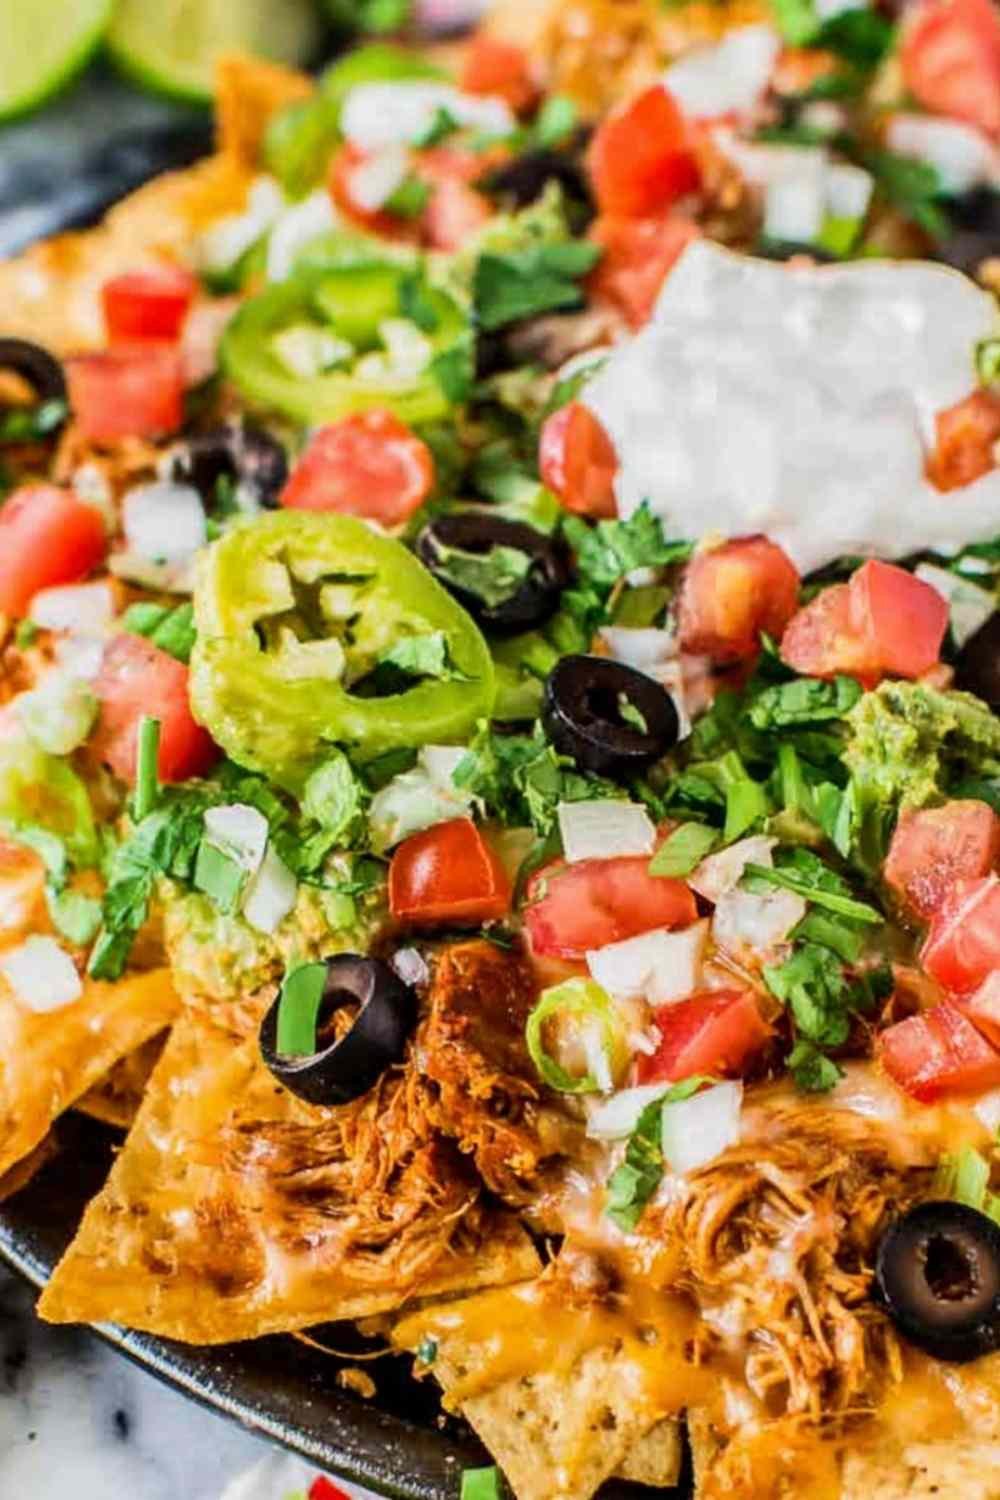
Step 5: Pull the pan from the oven and immediately add your cold toppings: sour cream, guacamole, diced tomatoes, pico de gallo, cilantro, and pickled jalapenos. Serve straight from the pan right away while the cheese is still hot and gooey.
What to Serve with Rotisserie Chicken Nachos
These nachos are satisfying on their own, but a few simple sides make the meal feel more complete. Here are my favorite pairings that work well with the cheesy, savory flavors on the pan.
Cilantro Lime Rice: A small scoop on the side is a natural match for the Tex-Mex flavors in these nachos. The bright citrus note cuts through the richness of the melted cheese beautifully.
Creamy White Chicken Chili: A warm bowl alongside the nachos adds extra protein and a hearty, comforting contrast. It turns this into a serious game-day spread without much extra work.
Taco Rice Bowl: If you have bigger appetites at the table, this bowl rounds out the meal with extra substance and keeps everyone in that same bold flavor zone.
Loaded Potato Taco Bowl: The creamy, potato-forward flavors here pair well with the crispy nacho texture and make for a filling and crowd-pleasing dinner combination.
Chicken Avocado Wrap: A lighter option that balances the richness of the nachos. Great for serving alongside when you want variety on the table without a lot of extra cooking.
Baked Chicken Tacos: If you are feeding a crowd that cannot get enough Tex-Mex, these tacos are a perfect companion dish. Make both on the same night and let everyone mix and match.
Sweet and Spicy Chicken Wings: For game day or a casual weekend dinner, these wings turn your nacho spread into a full party table. The sweet heat plays off the cheesy nachos really well.
Beef and Cheese Chimichangas: Another Tex-Mex favorite that pairs naturally here. Serve these alongside for a dinner that hits every comfort food note.

Storage & Serving Tips
Nachos are best eaten immediately after coming out of the oven. That said, if you have leftovers, store them in an airtight container in the refrigerator for up to two days. Keep cold toppings like guacamole, sour cream, and fresh salsa stored separately so the chips stay as intact as possible.
To reheat, I recommend spreading the leftover nachos on a baking sheet and warming them in a 375 degree F oven for 5 to 8 minutes. This brings back some of the chip texture and re-melts the cheese far better than a microwave, which tends to make everything soft and soggy.
Pro tip: if you are planning to make these for a party or larger gathering, prep all your toppings and shred the chicken ahead of time. When guests arrive, assembling and baking takes under 15 minutes. You can also check out this One Pot Queso Chicken and Rice for another easy crowd-pleaser that pairs great on a party spread.
Frequently Asked Questions
Can I use leftover chicken instead of rotisserie chicken?
Yes, any cooked and shredded chicken works well here. Leftover grilled chicken, baked chicken, or even chicken fajitas meat all make great substitutes with no change to the baking time.
How do I keep the bottom chips from getting soggy?
The key is using restaurant-style chips, which are thicker and hold up better under heat. Also avoid adding wet toppings like salsa or sour cream before baking. Always add cold toppings after the nachos come out of the oven.
Can I make these nachos ahead of time?
You can assemble the layers on the pan up to one hour before baking and keep it loosely covered at room temperature. Do not refrigerate the assembled pan before baking or the chips will absorb moisture and lose their crunch.
Easy Rotisserie Chicken Nachos
Ingredients
Equipment
Method
- Preheat your oven to 425 degrees F. Line a large rimmed baking sheet or high-sided oven-safe skillet with aluminum foil or parchment paper for easy cleanup.
- Spread half of the tortilla chips in an even layer across the lined pan. Top with half the shredded rotisserie chicken, half the drained and rinsed beans, and half the shredded cheese. Spread everything as evenly as possible so each chip gets covered.
- Add the second layer of chips directly on top of the first, then finish with the remaining chicken, beans, and cheese. Arrange the top chips slightly fanned out for easy serving. Do not pack them too tightly or the bottom layer will steam instead of staying crispy.
- Bake for 10 to 12 minutes, or until the cheese is fully melted and bubbling. Watch the outer edges closely around the 10-minute mark as they can brown quickly at this temperature.
- Remove from the oven and immediately top with cold toppings: sour cream, guacamole, diced tomatoes, pico de gallo, cilantro, and pickled jalapenos. Serve straight from the pan right away while the cheese is still hot.


")